Edit file metadata

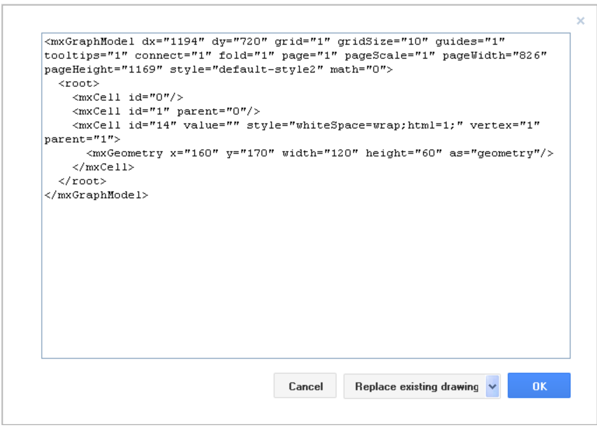
Drawing diagrams can be represented using XML metadata, and metadata files associated with diagrams can be viewed and edited. Open the chart file and select other-> edit chart. A screen displaying XML metadata will appear.

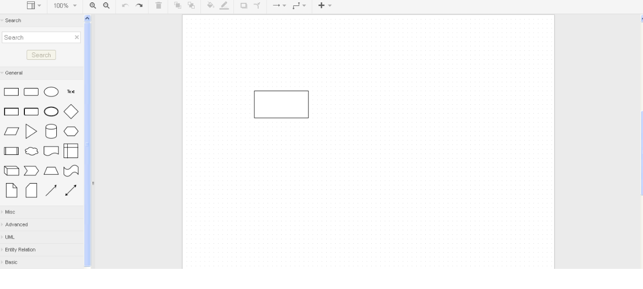
Below we see a simple diagram, containing a rectangle and related metadata files.

We can decide to add an additional rectangle to the chart, which is located below the first rectangle. In this case, we can cut and paste the code of the first rectangle (see the highlighted code below), assign a new unique identification number, change the Y coordinate, and then click “OK” (note that the adjacent drop-down menu will replace the existing drawing by default, which is exactly what we want in this case).
Sure enough, our chart now contains two rectangles.
The drop-down menu has several other options. If you do not want to change the original chart, you can choose to open it in a new window. Also added to existing drawings, its function is similar to file-> import from (explained in import file).
To use this option, you must first delete the existing metadata from the window and then copy the metadata corresponding to different system diagrams. Then select add to existing drawing and click ok. This will add elements associated with metadata from another diagram while preserving elements in the existing diagram.
Edit element metadata
There are many options in the Edit menu that allow you to edit various aspects of element metadata. If we select a rectangle in the above figure, we can access three options: Edit Metadata,Edit Tooltip and Edit Style.
Edit Style
This provides the same function as the Edit Style button on the Styles tab of the Format panel. To learn more about styles and how to edit related material data, please read the user’s manual entry on the style options.
Edit tooltip
Tooltips are introduced in the drawing environment. You can edit a tooltip for an element by selecting the element and then selecting edit-> edit tooltip, which displays the following screen:

You can type a tooltip in the fields provided and press Apply. If we hover the mouse over the shape, we will see a tooltip appear.
Edit Meta
You can edit metadata for a specific element by selecting the element and selecting edit-> edit metadata, which will display the following screen:

Here, let’s look at the metadata of the rectangle in the previous example.
We can see that there is a metadata attribute associated with the tooltip we added. We can edit this entry or delete it by clicking the cross to the right of the field.
We can add more metadata attributes by entering the attribute name in the field and clicking Add Attribute.
Next we added a new attribute called WebLink.
We can now use a new field, and we can add any information we think appropriate (in this case, a web address).
Press Apply to save the new metadata or Cancel to return to the main workspace without saving